I love SwiftUI. It’s such a great technology and so much fun to use. And it recently sent me on a days long tangent to figure out a problem that used to be quite simple.
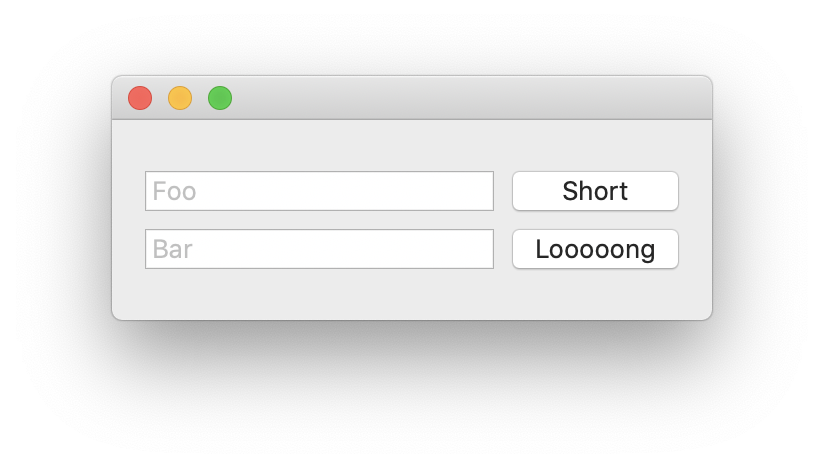
All I wanted to do was lay out something like this window on macOS:

The only “tricky” thing with this is the requirement that both buttons be equal width and size-to-fit for the button with the longest title text.
Using Auto Layout, you simply create the buttons and add an “Equal Width” constraint and the layout mechanics take care of the details.
Now if you know of a simple way to do this in SwiftUI, please stop reading and email me. To the best of my knowledge this is not straightforward. You need to use what I’d consider the advanced feature of preferences to communicate the maximum width between the buttons.
I eventually arrived at the following solution, which I actually find quite nice and generic but took a while to assemble:
struct ContentView: View {
    @State var foo = "Foo"
    @State var bar = "Bar"
    enum RightColumnWidth: Preference {}
    let rightColumnWidth = GeometryPreferenceReader(
        key: AppendValue<RightColumnWidth>.self,
        value: { [$0.size.width] }
    )
    @State var width: CGFloat? = nil

    var body: some View {
        VStack {
            HStack {
                TextField("Short", text: $foo)
                Button(action: {}) {
                    Text("Short")
                        .read(rightColumnWidth)
                        .frame(width: width)
                }
            }
            HStack {
                TextField("Bar", text: $bar)
                Button(action: {}) {
                    Text("Looooong")
                        .read(rightColumnWidth)
                        .frame(width: width)
                }
            }
        }
        .assignMaxPreference(for: rightColumnWidth.key, to: $width)
    }
}
There are a few details hidden off-screen here but they are reusable machinery that you write once and can move into its own file somewhere.
The following describes the journey and the full details.
First steps
At the start of every problem is a web search and it quickly became obvious that a) I’m not alone in trying to figure this out, b) it’s definitely not a simple three liner, and c) I’ll be regretting my OCD for not just getting the width of the widest button and hardcoding it for all of them.
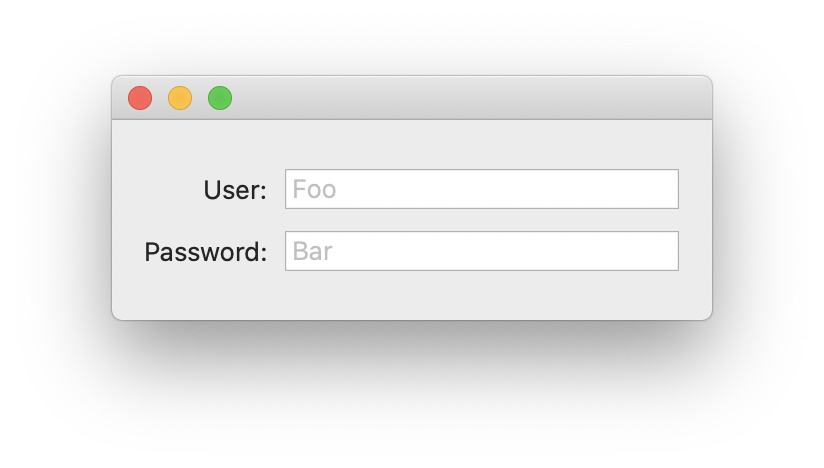
The first lead I stumbled across was, of course, a Stackoverflow question by Mostafa Mohamed Raafat. He was asking for help with the following layout (on iOS, but thanks to SwiftUI most of this is practically the same on macOS):

This looked like a good start and though I wasn’t too thrilled that the top answer by Rob Mayoff was dealing with preferences it nonetheless looked like that part can be nicely abstracted away.
Not that there is anything wrong with preferences – it just seems an odd bit of boilerplate required for something to seemingly mundane as equal widths. (I understand that it sort of has to be that way, because there is no constraint solver in SwiftUI but still – it was a surprising amount of effort.)
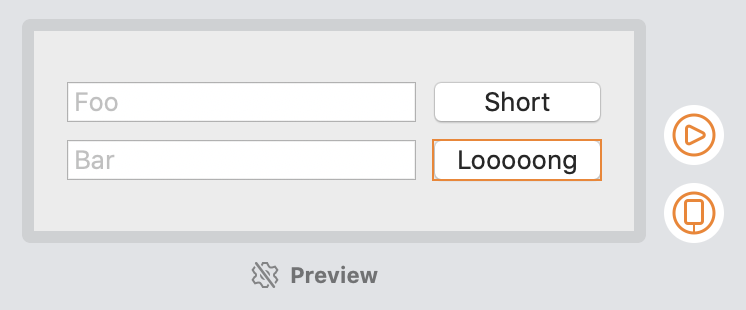
So I plugged it into my project, adapted it for buttons and got this preview – sweet.

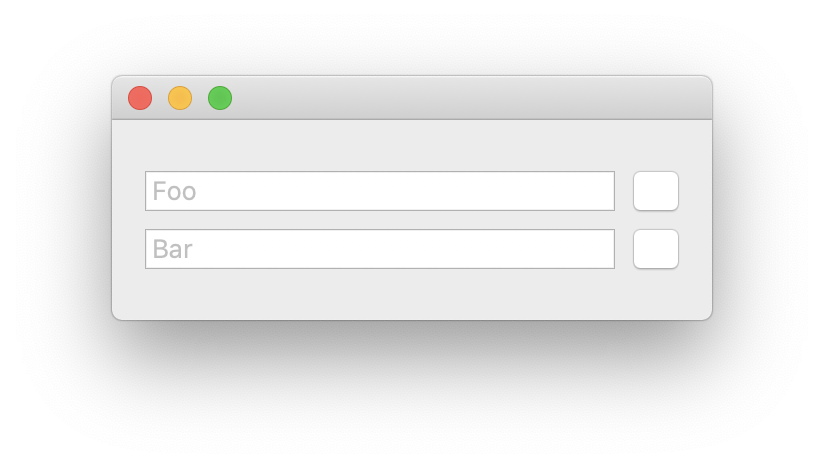
And then I ran it.

🤔
Bizarrely, it seems like at runtime the button Texts get pinned to width zero immediately, before their intrinsic sizes can be read and propagated by the preference system.
It might have something to do with how the Text is wrapped in a Button. I tried various ways of applying the frame inside and outside the Button and I did not find a way to get it to work at runtime with the method outlined in the Stackoverflow post.
This is actually the first time I’ve seen a discrepancy between preview and device rendering.
Attempt 2
In my search for solutions I also came across a post by Keith Lander who’s using PreferenceKey to apply equal widths to labels. His approach is very similar to Rob Mayoff’s but of course when you’re stuck you better try everything and anything.
And in fact it turns out Keith’s approach fixes the issue for the buttons (while also working for labels).
Now instead of simply taking Keith’s solution and applying it, I merged it with my previous attempt to generalise size constraint propagation in SwiftUI and in the following I’ll lay out (hah) that solution.
The general principle
Before we dive in, for those who haven’t read the underlying posts at all or in detail, the way the PreferenceKey mechanism works is the following:
You define a type conforming to the PreferenceKey protocol which holds data of type V you want to gather and a reducer, which aggregates into that data structure.
You trigger aggregation by applying a view modifier preference(key: K.self, value: V) where K is your PreferenceKey type and V is the data type you defined. You’ll aggregate from all the places you call this view modifier. That’s why you define a reducer on K. (If this sounds a little abstract at the moment, don’t worry - it should become clearer further down.)
Finally, you call the onPreferenceChange(key: K.self, perform: (V) -> Void) view modifier to do something whenever your preferences change. This is where we extract the reduced value associated with your PreferenceKey.
The PreferenceKey struct
So onwards to the actual implementation. What we need to do first is define our PreferenceKey type to hold the width(s):
struct AppendValue<T: Preference>: PreferenceKey {
    static var defaultValue: [CGFloat] { [] }
    static func reduce(value: inout Value, nextValue: () -> Value) {
        value.append(contentsOf: nextValue())
    }
    typealias Value = [CGFloat]
}
As you can see, we choose [CGFloat] as our value and we reduce by appending.
This is actually one of the important differences between the first and the second approach: In case of Text labels, it suffices to define the reducer simply in terms of a maximum and the data type as a straight CGFloat.
The approach of using an array works in both cases and therefore is more generally applicable. Since it abstracts away (as you’ll see), it’s probably best to simply use this solution in either case.
What is T: Preference?
Now you’re probably looking at that struct declaration and are wondering why on earth it is generic over T: Preference.
This is actually something you can completely ignore (and remove) if all you are collecting is a single preference. Just drop the <T: Preference> part and move on.
However, if for instance you have two different columns with different maximum widths you need to measure, you will need to define two distinct types for their PreferenceKeys.
And so instead of simple copying (and repeating) the complete AppendValue declaration with a different name we declare an empty protocol and a phantom type to achieve the same thing:
protocol Preference {}
enum WidthLeftColumn: Preference {}
enum WidhtRightColumn: Preference {}
let key1 = AppendValue<WidthLeftColumn>.self
let key2 = AppendValue<WidthRightColumn>.self
If you’d like to learn more about phantom types, John Sundell has you covered. In the context of this post just treat it like a convenient labelling mechanism that avoids some code duplication.
Calling preference(key:, value:)
With this in place we can now look at calling the “reducer”. What we need to do is determine the width of the view we’re interested in and send it to the reducer.
The best way to get the width of a view is to use a GeometryReader on its background. For the measurement, we use a Color.clear view as follows:
Button(action: {}) {
    Text("Short")
        .background(GeometryReader {
            Color.clear.preference(key: key2.self,
                                   value: [$0.size.width])
        })
    ...
Assigning the preference value
The last step is to react to preference changes and to update a tracking @State variable with changes that we’ve collected.
We define that variable as
@State var width: CGFloat? = niland assign the preference value via
.onPreferenceChange(key2) { prefs in
    let maxPref = prefs.reduce(0, max)
    if maxPref > 0 {
        // only set value if > 0 to avoid pinning sizes to zero
        self.width = maxPref
    }
}
Finally, we want to set the button label frame to this width via the .frame() modifier:
.frame(width: width)The complete ContentView looks as follows now:
struct ContentView: View {
    @State var foo = "Foo"
    @State var bar = "Bar"

    @State var width: CGFloat? = nil

    var body: some View {
        VStack {
            HStack {
                TextField("Foo", text: $foo)
                Button(action: {}) {
                    Text("Short")
                        .background(GeometryReader {
                            Color.clear.preference(
                                key: key2.self,
                                value: [$0.size.width]
                            )
                        })
                        .frame(width: width)
                }
            }
            HStack {
                TextField("Bar", text: $bar)
                Button(action: {}) {
                    Text("Looooong")
                        .background(GeometryReader {
                            Color.clear.preference(
                                key: key2.self,
                                value: [$0.size.width]
                            )
                        })
                        .frame(width: width)
                }
            }
        }
        .frame(maxWidth: 300, maxHeight: 150)
        .onPreferenceChange(key2) { prefs in
            let maxPref = prefs.reduce(0, max)
            if maxPref > 0 {
                // only set value if > 0 to avoid pinning sizes to zero
                self.width = maxPref
            }
        }
    }
}

// extra declarations

protocol Preference {}
enum RightColumnWidth: Preference {}
let key2 = AppendValue<RightColumnWidth>.self

struct AppendValue<T: Preference>: PreferenceKey {
    static var defaultValue: [CGFloat] { [] }
    static func reduce(value: inout Value, nextValue: () -> Value) {
        value.append(contentsOf: nextValue())
    }
    typealias Value = [CGFloat]
}
That’s not so bad but there’s quite a bit of ceremony around reading and assigning the preferences that we could streamline.
Refactoring
There are three things we’ll want to improve:
- Turn
.background(...)into a view modifier so that we can hide and de-duplicate theGeometryReadermechanics - Generalise the mechanism so that we can re-use it for any dimension, not just
width - Wrap the
onPreferenceChangemodifier to hide the gory details
A generic geometry reader
The first and second point are actually intertwined. If we want to wrap .background(...) in its own modifier, we need to pass it two parameters:
- the preference key (
key2.self) - the value getter (
[$0.size.width])
The easiest way to do this is to define a wrapper type GeometryPreferenceReader that holds these values:
struct GeometryPreferenceReader<K: PreferenceKey, V> where K.Value == V {
    let key: K.Type
    let value: (GeometryProxy) -> V
}
This is a simple struct that holds the preference key type and a closure to extract a value V from a GeometryProxy input parameter.
The only tricky bit here is defining the generic types: We need to make sure that the preference key K we’re passing in wraps the same Value type as we’re getting out of the closure. (This is probably fairly obvious but I find it’s easy to lose track of what goes where when dealing with generics.)
With that we can now write key2 as follows:
let key2 = GeometryPreferenceReader(
    key: AppendValue<RightColumnWidth>.self,
    value: { [$0.size.width] }
)
This is nice – we’ve combined the phantom type which is the key for the preference with the accessor to the geometry. We’ve tied these two together in a single place and simply deal with key2 by itself from now on. This ensures we don’t accidentally mix up what value we pull into the preference in the various places where we read it.
ViewModifier conformance
We’ve got a little further to go before we can fully use key2 to read the preferences.
What we’d like to be able to do is the following:
Text("Short")
    .modifier(key2)
This doesn’t read very well at the moment, but we’ll get to that.
To be able to use key2 as a view modifier requires GeometryPreferenceReader to conform to the ViewModifier protocol. This is straightforward since it has access to the parameters we need:
extension GeometryPreferenceReader: ViewModifier {
    func body(content: Content) -> some View {
        content
            .background(GeometryReader {
                Color.clear.preference(key: self.key,
                                       value: self.value($0))
            })
    }
}
We simply use our key type self.key and the closure self.value as parameters to the .preference call, passing in the GeometryReader as $0 to the value closure.
Assigning the preference to $width
We also need to update our onPreferenceChange assignment to use the new key definition, key2.key instead of key2:
.onPreferenceChange(key2.key) { prefs in
    let maxPref = prefs.reduce(0, max)
    if maxPref > 0 {
        // only set value if > 0 to avoid pinning sizes to zero
        self.width = maxPref
    }
}
There’s another argument here to deal with readability, so let’s tackle the final small change and factor the preference update handler into its own view extension.
We’d like to write the above as follows:
.assignMaxPreference(for: rightColumnWidth.key, to: $width)and for that we need to extend View with a function assignMaxPreference:
extension View {
    func assignMaxPreference<K: PreferenceKey>(
        for key: K.Type,
        to binding: Binding<CGFloat?>) -> some View where K.Value == [CGFloat] {

        return self.onPreferenceChange(key.self) { prefs in
            let maxPref = prefs.reduce(0, max)
            if maxPref > 0 {
                // only set value if > 0 to avoid pinning sizes to zero
                binding.wrappedValue = maxPref
            }
        }
    }
}
There is probably a way to make this method slightly more generic than around CGFloat but there’s no real value in doing so, since we’ll typically be dealing with values coming out of GeometryReaders. Also, reduce(0) limits how generic this can be and even if you avoid using reduce here you’ll end up needing the notion of a zero to initialise the wrapped value.
It’s simply easier to stick with CGFloat and step around the issue.
Final clean up
Now that we have all the bits in place we can make a couple of final tweaks to tidy things up. Let’s rename key2 to rightColumnWidth:
let rightColumnWidth = GeometryPreferenceReader(key: AppendValue<RightColumnWidth>.self) { [$0.size.width] }and add a little extension to View so we can write:
.read(rightColumnWidth)instead of .modifier(rightColumnWidth):
func read<K: PreferenceKey, V>(_ preference: GeometryPreferenceReader<K, V>) -> some View {
    modifier(preference)
}
With that, the final ContentView looks like this:
struct ContentView: View {
    @State var foo = "Foo"
    @State var bar = "Bar"
    enum RightColumnWidth: Preference {}
    let rightColumnWidth = GeometryPreferenceReader(
        key: AppendValue<RightColumnWidth>.self,
        value: { [$0.size.width] }
    )
    @State var width: CGFloat? = nil

    var body: some View {
        VStack {
            HStack {
                TextField("Foo", text: $foo)
                Button(action: {}) {
                    Text("Short")
                        .read(rightColumnWidth)
                        .frame(width: width)
                }
            }
            HStack {
                TextField("Bar", text: $bar)
                Button(action: {}) {
                    Text("Looooong")
                        .read(rightColumnWidth)
                        .frame(width: width)
                }
            }
        }
        .frame(maxWidth: 300, maxHeight: 150)
        .assignMaxPreference(for: rightColumnWidth.key, to: $width)
    }
}
With the following re-usable definitions:
struct GeometryPreferenceReader<K: PreferenceKey, V> where K.Value == V {
    let key: K.Type
    let value: (GeometryProxy) -> V
}

extension GeometryPreferenceReader: ViewModifier {
    func body(content: Content) -> some View {
        content
            .background(GeometryReader {
                Color.clear.preference(key: self.key,
                                       value: self.value($0))
            })
    }
}

protocol Preference {}

struct AppendValue<T: Preference>: PreferenceKey {
    static var defaultValue: [CGFloat] { [] }
    static func reduce(value: inout Value, nextValue: () -> Value) {
        value.append(contentsOf: nextValue())
    }
    typealias Value = [CGFloat]
}

extension View {
    func assignMaxPreference<K: PreferenceKey>(
        for key: K.Type,
        to binding: Binding<CGFloat?>) -> some View where K.Value == [CGFloat] {

        return self.onPreferenceChange(key.self) { prefs in
            let maxPref = prefs.reduce(0, max)
            if maxPref > 0 {
                // only set value if > 0 to avoid pinning sizes to zero
                binding.wrappedValue = maxPref
            }
        }
    }

    func read<K: PreferenceKey, V>(_ preference: GeometryPreferenceReader<K, V>) -> some View {
        modifier(preference)
    }
}
And there we have it: a reusable way to propagate size constraints in SwiftUI.
Notably:
- We specify which dimension we are using in a single closure of shape
(GeometryReader) -> V. This can be a width, a height - anything or even any combination of things thatGeometryReadercan provide. - We can track multiple measurements simply by introducing different
GeometryPreferenceReaderstagged by a phantom type. - Recording the preference is done via a call to the
.read(preference)view modifier on each view that participates in the constraint, which is readable and concise. - The preference is applied in a single location by assigning it to a binding via
.assignMaxPreference(for: key, to: $width). That’s also readable and to the point.
Note that this last step is one area where we may want to extend the system further, say for example if we want to track a minimum width.
In that case we could extend View with, say, func assignMinPreference(for:To:) and pick out the minimum value to assign to the binding.
I hope this may prove useful to others. If you have questions or know of a better way to achieve the same result, please let me know via Twitter or email.
Credits
A special shout out to Javier and his excellent series about the view treewhich helped a lot with understanding the details of the PreferenceKey system.
